



MASONLINE Ceiling Grid System Suspension Ceiling System Main Tee Cross Tee Wall Angle Besi Siling Plaster Besi Ceiling Tee Tulang Siling Office
A typical dropped ceiling consists of a gridwork of metal channels in the shape of an upside-down "T", suspended on wires from the overhead structure. These channels snap together in a regularly spaced pattern of cells. Each cell is then filled with lightweight ceiling tiles or "panels" which simply drop into the grid.Application:Office Ceiling, Shop lot Ceiling, Suspended Area Ceiling Warehouse ceiling, Household Ceiling & etcMaterial:G.i With powder coatedProduct Details:2 / 4 feet Cross Tee : Shorter steel beams that run perpendicular and parallel to main beams to form the grid openings that support the tiles.5 feet Main Tee : Load-bearing beams of a suspension system that are hung with hanger wires.6 feet Wall Angle : Attaches to the wall to support tiles and offers a consistent visual to the main beams and cross tees for a finished look.Installation Guide1. Hang Main Beams – Cut the first main beam to make sure there is a cross tee hole where your pre-determined first border cross tee is to be located. The first cross-tee hole in each row of main beams must line up. Always put the cut end of the main beam on the wall molding. To hang, simply slide each hanger wire or QuickHang hook through one of the small round holes in the main beam. Repeat these steps for the second main beam.2. Install the Cross Tees – You will need to measure and cut the border tees to the border panel size. Place cut end of tees on wall molding and connect the uncut end to main beam. Now insert the first two uncut cross tees in line with the border cross tees. When connecting two cross tees in the same rectangular hole in a main beam, insert the second tee into the slot by passing on the right side of the already installed tee.3. Install the Wall Angle – Mark the desired new ceiling height on the wall. Snap the chalk line tool to create this guideline. Repeat on all walls. Be sure to make sure all lines are level and match around the room. If you have a laser level handy, you can use that for a quicker way to mark where the molding will be placed. Next, nail wall molding to studs. For concrete or stone walls use appropriate fasteners or substitute the wall molding by hanging a main beam runner from the joist closest to the wall.

MAS Online

You May Also Like
DASQUA Taper Gauge 1-15mm Feeler Gauge Metric and Imperial Welding Taper Gauge Depth Gauge Stainless Steel 64- DTG05

GLOBECART EVA Foam Sponge Tape Single-sided Strong adhesive Rubber Seal Strip 10M Window Door Seal Strip
Nasara 20 / 24 / 40 Inch Stainless Steel Vernier Caliper Ruler Gauge Manual Caliper Micrometer Kaliper
Rubber Door Stop Anti-Slip Wedge Stopper No Drilling Required Home Office Child Safety Getah Pintu
CPAP Adjustable 5 Angle Ventilator Head Strap Anti-snoring Head Strap Adjustable Mask Strap Hexagon Ventilator Strap
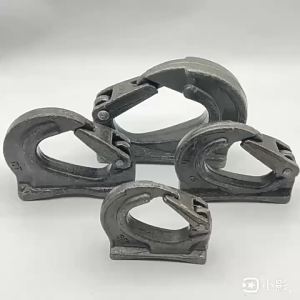
Lifting Hook for Excavator Bucket

1M UL1571 Electronic Wire 28 AWG PVC Insulated Tinned Copper Environmental LED Line DIY Cord

Save Electric Bill Electricity Saving Box Electric Energy Saver Jimat Elektrik Rumah Penjimatan Elektrik Electric Saver Box Saving Device Power Saver Malaysia Plug Power Saving Box Power Factor Saver Alat Jimat Elektrik Rumah 省电王2026 节电器 省电神器 節電王

Shock Absorbing Silicone Protective Knee Support Strap Shock Absorption Elastic Compression for Outdoor Sports Tennis Rope

Moisturizing Beauty Night Sleep Gloves Cotton
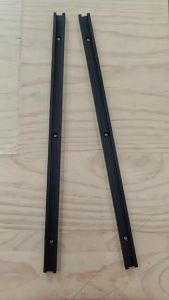
DIY & Woodworking T-Slot Track System 19x9.5mm Aluminum Guide Rail for Precise Miter Gauges Jigs and Fixtures